Zip Subdirs
Copyright 2016, Andrew R. Proper.
![]()
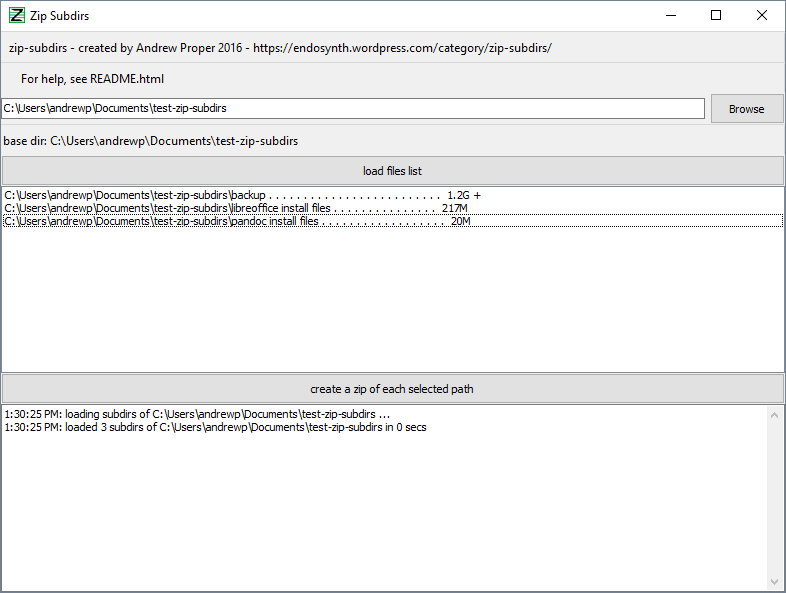
Zip Subdirs allows the user to select a directory, then displays the list of subdirectories under that directory. The user can select one or more (Ctrl-click) subdirectories to zip, then press the Zip button.
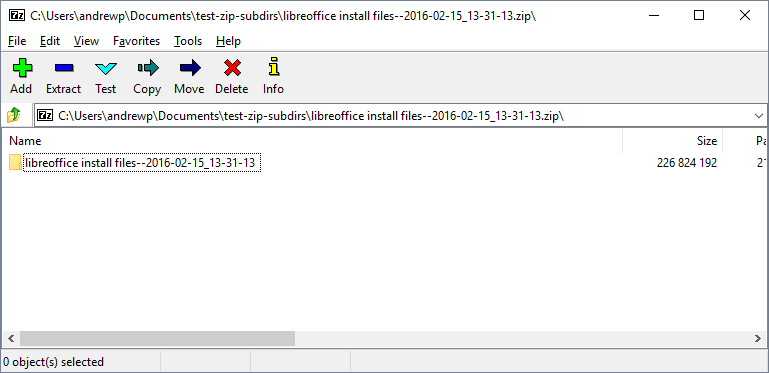
Subdirectories will be zipped in the order they are listed. Each one will be zipped into a timestamped zip file. Insize the zip file, the top-level item will be the subdirectory with a timestamp appended.
Version 0.1.0
February 15, 2016
Tested on Windows 7, 8, 10.
Problems and Features
Please report any problems any feature requests on the issues page.
Please create one issue per problem or feature, for easier tracking.
License: GPL v3
This program is free software: you can redistribute it and/or modify it under the terms of the GNU General Public License as published by the Free Software Foundation, either version 3 of the License, or (at your option) any later version.
This program is distributed in the hope that it will be useful, but WITHOUT ANY WARRANTY; without even the implied warranty of MERCHANTABILITY or FITNESS FOR A PARTICULAR PURPOSE. See the GNU General Public License for more details.
You should have received a copy of the GNU General Public License along with this program. If not, see http://www.gnu.org/licenses/.
Install
First install DWIMPerl.
- This was tested with DWIMPerl v5.14.2.1 v7 32 bit for Windows.
- If you cant get DWIMPerl, Strawberry Perl may work.
After that is installed, you can run the zip-subdirs shortcut to start. If the shortcut fails, try running the zip-subdirs.bat batch file.
If you have problems, try running zip-subdirs-debug.bat to see any debug or error output (in the black command prompt window).
How to Use
First, select a parent directory using the “Browse” button. This should then display a list of sub-directories in the text area below the “Browse” button. These are directories inside of the parent directory.

Next, select one or more sub-directories to copy into archive zip files. You can select only one, or some, or all of them.
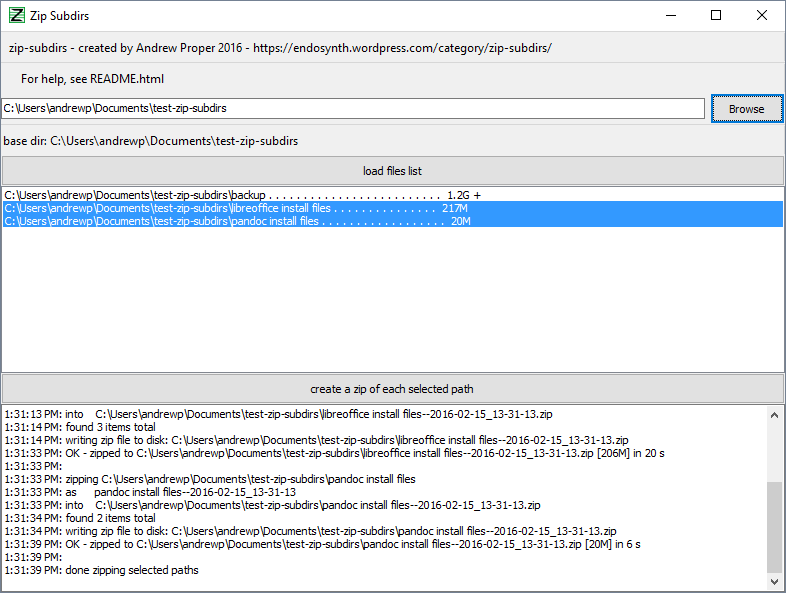
After that, click the “create a zip of each selected path” button. Results of zipping will be shown in the bottom text area. Directories will be zipped one by one. Each resulting zip file will have a timestamp added to the end of the file name, and will contain the zipped directory with the timestamp added to the end of its name.

The timestamps make this useful for backing up timestamped zips of directories. They are also helpful for extracting/unzipping, because when you extract the zip file with paths enabled, the top directory will have a timestamp on it. This way, you can archive the same directory multiple times, and extract the archives, without the extracted archives overiting each others’ directories.
This screenshot shows a resulting zip file opened in 7zip.

Configuration
The config file is connfig.yaml. It is a plain text file and can be editing with Notepad, gVim, etc.
It is in YAML format, which is white space sensitive. So don’t change the white space, only change the values.
The following options exist:
- get_tree_du_max_ms : 5000
- this is how long, in milliseconds, to wait to load disk usage per subdirectory. If loading takes too long, it will be stopped and a “+” sign will be shown beside the shown directory size.
- the value, 5000, means 5000 milliseconds, or 0.5 seconds.
- some computers are faster at loading disk usage than others.
- if your computer is slow to load the subdirectories list, change this to a smaller number to speed up the loading.
Compiling to Exe
You will need to install the PAR::Packer CPAN module into DWIMPerl, using its cpan interface. This basically involves opening a Windows command prompt and running:
cpan
> install PAR::Packer
After that, you can run compile_to_exe.bat to create a .exe file from the .pl file.
Note that this essentially just creates a zip of the perl code which can extract and run itself. It may not be better or faster than running the .pl file directly via its .bat file.
Andrew SOFTWARE
Backup Compression GUI
